


 But, before I go down the cheese rabbit hole (and trust me, I’m going to go to there), I want to let you all know that registration has finally opened for our Sweden food photography, styling, & portrait workshop! Yes, this workshop will have a special emphasis on shooting people with food, including self-portrait set ups, in addition to the normal food photography materials. And joining us in addition to myself and Carey will be Izy Hossack from Top with Cinnamon and Elenore Bendel Zahn from Earthsprout! I am so, soooo stupendously excited for this class. We found the most incredible location for the 4 day workshop on the shores of Lake Koppan deep in the forest of Southern Sweden and we’ll be eating farm-fresh summer foods all workshop-long. We’ll also have especially long shooting days since we’ll be so far north, so we’ll be able to enjoy our private dock and lake shores under the summer sun long into the evening. To register and read a bit more about the workshop and its contents, follow the link below. We would love to have you join us!
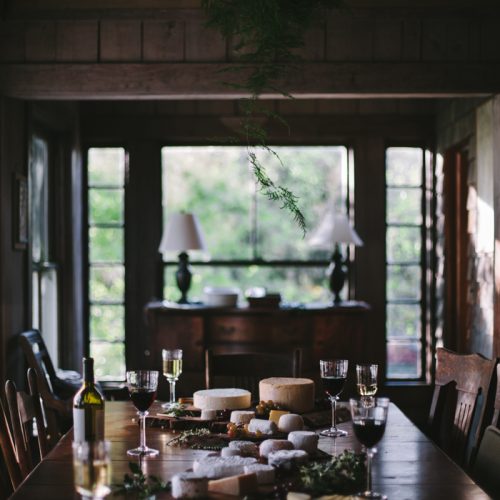
 Now, back to the burrata! The outer casing is actually mozzarella cheese that has been stretched to create and accommodate a pouch of filling. There’s a couple different filling options for burrata, usually it is stuffed with either tiny shreds of mozzarella mixed with heavy cream, or straight-up ricotta. I decided to stuff mine with ricotta because homemade ricotta is really easy to make and also tastes insanely, ridiculously good. Whatever you decide to use for your burrata’s filling though, make sure it is slightly warm or at least room temperature. The reason for this is because the mozzarella is very hot when you stretch it out to put the filling in it, and if you put cold filling in the hot mozzarella it will make it harder to stretch and seal around the filling since the mozzarella slab will firm up and become less flexible.

There’s a couple different ways to make mozzarella, you can do it with a culture which takes a bit more time (about 5 hours) because you need to allow the culture to grow and reproduce as the curd and whey are slowly heated. I tried it this way and while it was tasty, I personally didn’t notice much of a taste different between this method and the citric acid method, which takes about an hour and a half. I’ve also used mozzarella recipes that have you measure the pH of the curd and use that as the basis of when to start stretching it, and I’ve used others that go off of the temperature of the curd as the basis of when it’s safe to start stretching it without risking tearing the curd. I’ve had success with both, and since most of us have thermometers rather than pH meters in our kitchens, I’ve just used the temperature method in the recipe below. But if you’re interested in getting deeper into cheese making, especially with aged and hard cheeses, investing in a solid pH meter would be a good idea. However, if you’re just planning on making basic fresh cheeses like ricotta, feta, mozzarella, and queso fresco, it is less of a necessity (although still helpful).
Once you’re done with your burrata, I recommend eating it while it’s fresh just because the textures are better that way. I personally love melted burrata, so I’ll brush a slice of good bread with some olive oil and sprinkle it with little diced tomato and place half of a burrata on top so the gooey filling starts to come out. Then I like to sprinkle it with black pepper and broil it in the oven for a couple minutes until the bread gets toasty around the edges and the burrata gets real melty. It’s simple, but so, sooooo insanely good. Also, putting it on top of a pizza is always an excellent choice. But if you want to enjoy it later, you can store it suspended in water in an airtight refrigerated container for up to 1 week (although the sooner you eat it, the better). Enjoy, all, and good luck with your cheese making!


Homemade Burrata
Ingredients
Homemade Ricotta
- 1 gallon raw whole milk
- 1 teaspoon citric acid
- 2 teaspoons kosher salt
Homemade Burrata
- 1 gallon raw whole milk
- 1 1/2 teaspoons citric acid diluted with 1 cup cold water
- 1/4 teaspoon liquid rennet stirred with 1/4 cup cold water
- 4 to 8 tablespoons ricotta
- Ice water bath
- Hot not boiling water bath
Cheese Making Tools
- 4 6-inch pieces of cooking twine
- accurate thermometer
- long sharp knife
- colander
- butter muslin
Instructions
-
Begin by making the ricotta. In a large stainless steel pot, whisk together the milk, citric acid, and 1 teaspoon of the salt. Place the post over low heat and gradually heat the milk to about 185 to 190 degrees Fahrenheit, stirring every few minutes to keep the milk from burning on the bottom of the pot (it will take about 20 minutes to heat up to this temperature over low heat, so just be patient and listen to a podcast near the stove).
-
As the milk warms, you’ll start to see the curd and whey separating. The curd is solid white and the whey is the liquid, usually a cloudy pale yellowish color. Once the milk reached the right temperature, remove it from the heat. Run a spatula around the inside edge of the pot to help gently rotate the curds that have begun to form. Cover the pot and set it aside to rest for 10 minutes.
-
Place a stainless steel strainer over a bowl and line the strainer with butter muslin. Use a mesh skimming spoon to remove the curds from the pot and slowly, scoop by scoop, transfer them over to the lined strainer. Sprinkle the remaining 1 teaspoon salt over the cheese and toss gently with your hands to distribute.
-
Tie the opposite two ends of each of the opposing corners of the cloth together. Use one hand to hold the knots at the top and use the other to hold the ricotta from underneath as you lift the muslin and suspend it. Twist the fabric from the knotted area to help encourage the ricotta to drain. Do not do this forcefully, however, or you risk tearing the muslin. After a few squeezes, hang the butter muslin by the knot from the faucet of your sink, suspending it above your sink to allow it to drain for 10 to 20 minutes. If you want a more moist and wet ricotta, you can remove it once the dripping slows down. If you want a drier ricotta, you can remove it when the dripping nearly stops (I like the wetter one, personally). Remove the muslin from the faucet and empty out the ricotta into a bowl. Set aside.
-
For the burrata, stir together the milk and diluted citric acid mixture in a large non-reactive pot over low heat. Place a dairy thermometer in the pot and slowly heat the mixture until it is 90 degrees Fahrenheit (takes about 15 minutes).
-
Remove the pot from heat and stir in the diluted rennet. Continue stirring for 30 seconds, then cover and allow the mixture to rest off the heat for about 5 to 7 minutes.
-
Use a wooden spoon to press down on the curds that have formed along the edge of the pot. The whey should be fairly transparent and the curd should feel like a custard. If the curd hasn’t separated yet give it a few more minutes and come back to cheek on it.
-
Use a very long and sharp knife to cut the curd in the pot into a grid of 1-inch squares. Place the pot back over low heat and allow to cook until the temperature reaches 105 degrees Fahrenheit, stirring once every 2 minutes (takes about 15 minutes). Monitor closely and do not overheat.
-
Remove from heat and stir for 3 minutes to allow the curds to cool slightly. Place a colander over a bowl and use a slotted spoon to transfer the curds from the pot to the colander. Once all the curds are transferred hold the colander over the pot of whey and use one hand to gently press on the curds to help the excess whey drain off. Transfer the drained curds to a microwave safe bowl.
-
The following steps happen very quickly, so make sure you have the pre-cut cooking twine, the ice bath, the hot water bath, the ricotta, and a large sharp knife all laid out on a clean and flat working surface.
-
Place the bowl in the microwave and microwave on high for 1 minute. Knead the curds in the bowl gently and then microwave for 30 seconds more. Take the temperature of the curds, you want it to be 135 Fahrenheit. If it isn’t, knead and microwave for another 30 seconds and then check again.
-
Once it reached 135 degrees Fahrenheit, place the slab on your working surface and cut it into four pieces. Grab each piece and quickly but gently stretch it out into a roughly 6-inch circle. Place them on the working surface, not touching each other. Place 1-2 tablespoons of ricotta in each one, then gather up the edges and pinch them together over the filling like a pouch. Hold it with one hand and tie a string very tightly around the pinched area with the other.
-
Take the burrata and dip it in the hot water bath to help seal the mozzarella tied together at the top of the burrata, then let it rest in the ice bath for 2 minutes. Allow the burrata to rest in the ice bath as you continue to prepare the remaining burrata, you must do it quickly while the mozzarella is still hot and pliable. Once all four burrata have been assembled and cooled, you can cut off the extra bundled mozzarella at the top and remove the string. The mozzarella should have sealed together above the ricotta and created burrata.
-
Burrata is best enjoyed fresh, but can be kept suspended in water in an airtight container in the refrigerator for up to 1 week.
Recipe Notes
Adapted from New England Cheesemaking Supply and Artisan Cheesemaking at Home


Love your food photography!
With love, Hayley x
http://thelifestylemenu.co.uk/
Ahh.! One day i will be taking beautiful pictures! Just like you, maybe only less perfect! 🙂
http://www.allnnothing.com
This looks amazing, I'm nervous to try it as my cheese making skills are complete beginner but I'm definitely going to attempt it
The way you described broiling that piece of toast and the burratta melting and becoming all gooey is making me absolutely drool! And that workshop sounds like a dream, what a way to see Sweden in the summer. lovely!
Oh wow this is so wonderfully shot and homemade burrata sounds amazing! Love the idea of broiling it – simplicity at its best!
Ohhhh Eva, I want to attend this workshop SO badly. Crossing my fingers that I can make it happen.
And lovely photos, as always. xoxo
This is so beautiful! I love the mood, lighting, decor, etc. in these photographs. Not sure I'll have the courage to make my own burrata anytime soon (although crazier things have happened)… meanwhile, I'll just stare at these images and pick my jaw off the floor.
http://relishingthyme.com/
I'm in love with these photos! So, so beautiful!
Oh I'm so so so jealous! That sounds like the most fantastic workshop EVER!
very very good , nice post , and careful description of this wonderful burrata , food loved by me !
Burrata is amazing and now I'm so inspired to make my own! Wish I could attend your classes 🙂 As always, these photos are beautiful!!
Sues
your pictures are stunning!!
https://aspoonfulofnature.wordpress.com/
This looks insaaaaaanely delicious, Eva!!!! Omgness I fell in love with burrata at first bite, at Gjelina in Venice, CA. This is beautiful recipe with even more stunning process shots. And that knife you're using is too gawgeous! Figures that I like knives. I like food and I like to cook 😉
Wow, what an interesting process. I am going to try this right away. It looks delicious!
These photos are amazing! Beautiful shots!
Great pictures, I bet it was delicious as well!
Eva: you are wonderfull!
Let's Be Penpals!
from my homestead to your inbox