

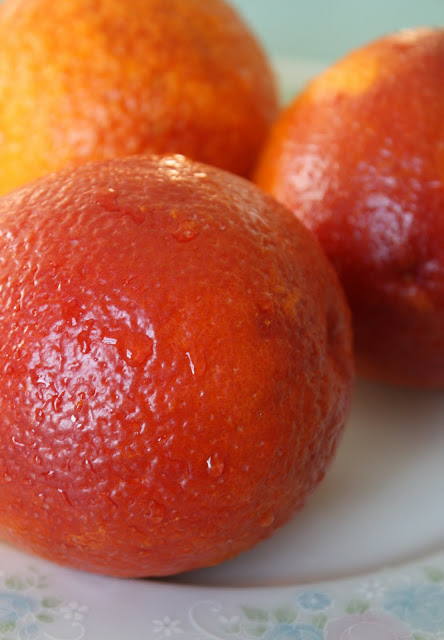
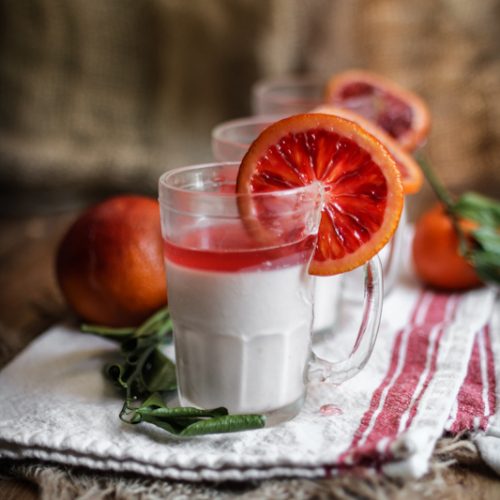
Late last week I saw that a shipment of blood oranges had come into the supermarket, I’d only had them once before and loved their flavor, so I decided to try and make something with them. My mind went into a flurry—cakes, pies, custards, or perhaps something chilled for the summertime? Blood oranges in a pastry or dough just seemed a bit strange to me, blood orange ice cream, however, seemed like a fantastic idea. So, I ran with it.
Making Blood Orange Ice Cream Without an Ice Cream Maker
I don’t have an ice cream maker, so I made this the old fashioned way in a plastic bag with epsom salt and ice. Basically, you need to use two resealable plastic bags. One of them has a mixture of epsom salt and ice, and the other bag has the ice cream mixture inside. The sealed ice cream bag goes inside the ice and salt bag, which is then sealed, and then you just turn the bag over non-stop for several minutes. I also read you can use a blender to make it, too, but haven’t tried that method yet.
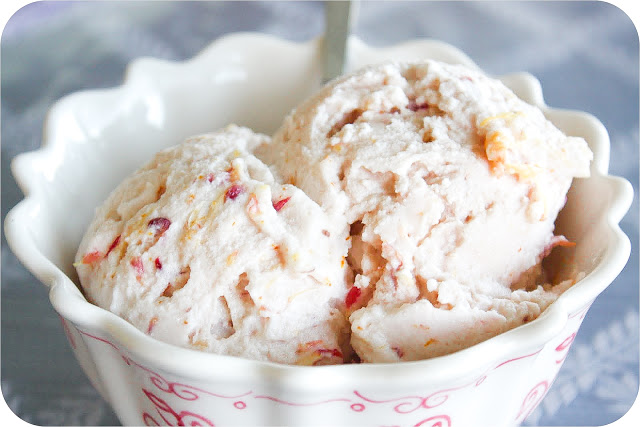
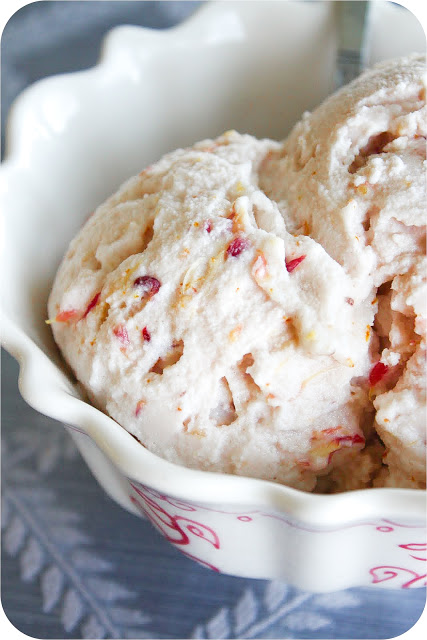
It took me about 7 minutes until an ice cream-like consistency started to form, but the time will vary depending on the temperature of the room you’re working in and how fast you’re turning it. It came out amazingly well, the blood orange flavor was so bright and citrusy, but with a hint of raspberry flavor mixed in. Absolutely incredible! I can’t wait to use them in more sweets in the future. They pair so well with the cream, and the colors in the blood orange ice cream were just beautiful. Little speckles of pink and orange all throughout. It was like a little work of art with every spoonful. And if you’re looking for another tasty ice cream recipe to beat the heat, this olive oil ice cream is a favorite of mine. Enjoy dear reader!

Old-Fashioned Blood Orange Ice Cream
Ingredients
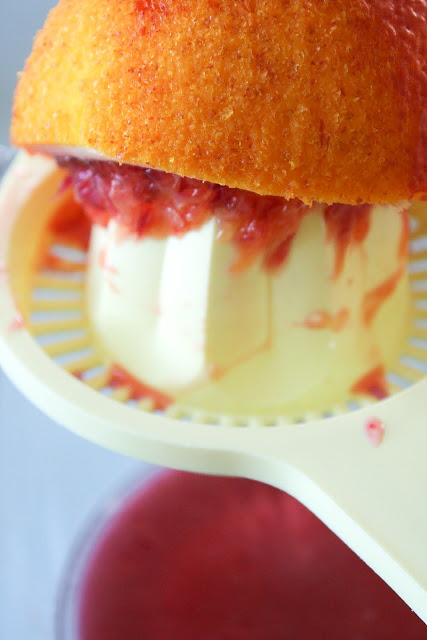
- Juice from 2 Blood Oranges with Pulp about 2/3 Cup
- 2 Tablespoons Grated Blood Orange Rind
- 2 and 1/2 Teaspoons Vanilla Extract
- 2 Cups Half & Half
- 1/2 Cup Sugar
- 3/4 Cup Epsom Rock Salt
- 2 One-Gallon Size
- Ziploc Bags
- Ice Cubes
Instructions
-
Fill one of the gallon ziploc bags half full with ice cubes and add the epsom salt, seal the bag and set aside. Place the half & half, sugar, blood orange juice, blood orange rind and vanilla in the other ziploc bag. Seal the bag and shake it for about 30 seconds to mix up all of the ingredients. Place the sealed bag with the blood orange mixture inside of the bag with the salt and ice cubes. Seal the outer bag as well.
-
Move and shake the bag constantly, turning it over from the front and sides, until the ice cream mixture hardens and becomes heavy, about 6 or 7 minutes. Remove the ice cream from the plastic bag and place it in a plastic bowl. Place the plastic bowl in the freezer for one hour, then empty the ice cream into a blender and blend on high until the ice cream is smooth. Place the ice cream back into the plastic bowl and place it in the freezer for another hour.
-
Scoop out ice cream and serve with a cold glass of milk.


This looks delicious! My husband and I love blood oranges! We have made your blood orange cupcake recipe a few times! This ice cream looks fantastic, but I was wondering if making it in an ice cream maker would work as well, or if the recipe would need to be adjusted. Any thoughts?
Recipe recipe classic Blood Orange is quite simple and attractive. I really love this ice cream. I will learn to make ice cream.
boxnovel
Top-notch paper at reasonable cost and delivered on time sounds like something unreal? Check out the https://www.writingpapersucks.com/studybay-com-review/ page to get more information about the platform that can make your dreams come true.
I’m constantly searching on the internet for posts that will help me. Too much is clearly to learn about this. I believe you created good quality items in Functions also. Keep working, congrats!
Looks amazing, cant wait to try this, More over if you’re a fan of aesthetic clothes please visit https://www.coupontive.com/view/66girls to avail 66girls discount.
Let's Be Penpals!
from my homestead to your inbox